If you’re searching for a step by step design guide for beginners, this detailed guide will help you understand design from the ground up in a practical and easy-to-follow way. Whether you want to design social media graphics, logos, websites, or marketing materials, the process remains similar. The key is to learn the fundamentals, follow a structured approach, and practice consistently.
This guide is written in a conversational style so you can follow along easily, even if you have zero prior experience.
Understanding the Basics of Design
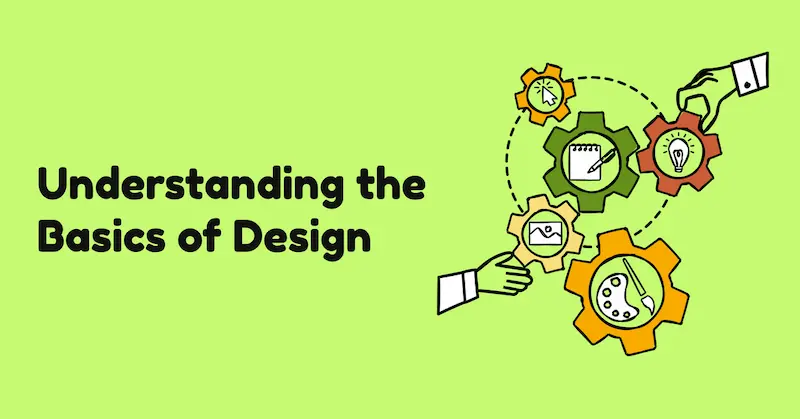
Before diving into steps, you should understand what design really means. Design is not just about making things look attractive—it’s about solving problems visually. A good design communicates a message clearly, guides the viewer’s attention, and creates a smooth experience.
There are four core principles you should always keep in mind:
- Balance: Ensuring elements are evenly distributed
- Contrast: Making important elements stand out
- Alignment: Keeping everything organized and structured
- Hierarchy: Showing what is most important first
Once you understand these principles, your design decisions become more intentional and effective.
Step 1: Define Your Goal Clearly
Every design begins with a purpose. Without a clear goal, your design can become confusing or ineffective.
Ask yourself:
- What is the purpose of this design?
- Who is my target audience?
- What action do I want viewers to take?
For example:
- A social media post may aim to attract engagement
- A business logo aims to represent a brand identity
- A website design aims to improve user experience and navigation
Defining your goal helps guide all your design choices from layout to colors.
Step 2: Research and Gather Inspiration
Before creating your design, spend time exploring ideas. This step helps you understand current trends and discover what works visually.
You can:
- Look at similar designs in your niche
- Observe color combinations
- Study typography styles
- Analyze layouts and spacing
While researching, don’t copy designs. Instead, focus on understanding patterns and techniques. Save references and create a mood board to organize your ideas.
You may also like it:
Modern Graphic Design Ideas For Beginners and Experts
Top Logo Design Tools Review: Best Logo Makers For 2026
Basic Design Principles Explained Simply for Beginners Guide
Cheap Graphic Design Tools Deals: Top Picks for Designers
Step 3: Choose the Right Design Tool
As a beginner, you don’t need advanced or complicated tools. Choose user-friendly platforms that allow you to experiment easily.
Look for tools that offer:
- Drag-and-drop functionality
- Pre-designed templates
- Font and color customization
- Image editing options
The goal is to learn design concepts first, not to master software. Once you get comfortable, you can explore more advanced tools later.
Step 4: Start with a Rough Layout
A layout is the structure of your design. It determines where elements like text, images, and icons will be placed.
Start by sketching a rough layout either on paper or digitally. Focus on:
- Positioning headings
- Placing images or visuals
- Arranging supporting text
Keep your layout simple and clean. Avoid overcrowding. A well-structured layout improves readability and visual appeal.
Step 5: Apply Grid and Alignment Principles
Alignment is one of the most important aspects of design. It ensures that your elements look organized and professional.
Use grids or guides to:
- Align text properly
- Keep margins consistent
- Maintain spacing between elements
When everything is aligned correctly, your design automatically looks more polished and balanced.
Step 6: Select a Color Scheme
Color selection plays a major role in design psychology. Colors influence emotions and perception.
Here’s how you can choose colors:
- Pick a primary color that represents your theme
- Add 1–2 complementary colors
- Use neutral colors like white, black, or gray for balance
Keep in mind:
- Bright colors grab attention
- Dark tones create a professional feel
- Soft tones give a calm and minimal look
Consistency in color usage is important. Avoid using too many colors in one design.
Step 7: Choose Appropriate Typography
Typography refers to fonts and how text is styled in your design. It impacts readability and tone.
Follow these best practices:
- Use 1–2 font families only
- Pair a bold font with a simple font
- Maintain consistent font sizes
- Ensure text is readable on all devices
Avoid overly decorative fonts unless they match your design theme. Clean and simple fonts usually work best for beginners.
Step 8: Add Images and Visual Elements
Visual elements help bring your design to life. These can include photos, icons, shapes, or illustrations.
When adding visuals:
- Use high-quality images
- Keep style consistency
- Avoid unnecessary clutter
- Make sure visuals support your message
Images should enhance your design, not distract from it.
Step 9: Use White Space Effectively
White space (or negative space) is the empty space around elements in your design. It is just as important as the content itself.
Benefits of white space:
- Improves readability
- Creates a clean look
- Helps focus attention on key elements
- Prevents overcrowding
Don’t feel the need to fill every space. A minimal design with good spacing often looks more professional.
Step 10: Create Visual Hierarchy
Visual hierarchy is about guiding the viewer’s eye through the design in the right order.
You can create hierarchy by:
- Using larger font sizes for headings
- Using bold or contrasting colors for important elements
- Positioning key elements at the top or center
- Using spacing to separate sections
This ensures viewers understand what to look at first, second, and so on.
Step 11: Review and Refine Your Design
Once your design is complete, review it carefully. This step is crucial for improving quality.
Check:
- Alignment and spacing
- Color consistency
- Font readability
- Visual balance
- Overall clarity of message
You may need to make small adjustments such as resizing elements, changing colors, or adjusting spacing. Refinement is part of the design process.
Step 12: Get Feedback and Improve
Feedback helps you grow faster as a designer. Share your work with others and ask for constructive criticism.
You can:
- Ask friends or colleagues
- Join design communities
- Compare your work with professional designs
Use feedback to identify areas of improvement and apply changes in future projects.
Step 13: Practice Regularly
Design is a skill that improves with consistent practice. The more you create, the better you understand design principles.
Try to:
- Work on small daily projects
- Redesign existing graphics
- Experiment with new styles
- Challenge yourself with different design types
Over time, you’ll notice improvement in your creativity, speed, and confidence.
Common Beginner Mistakes to Avoid
Here are some mistakes beginners often make:
- Using too many fonts
- Overcrowding the design
- Ignoring alignment
- Choosing random colors without a palette
- Adding too many visual elements
- Not maintaining consistency
Avoiding these mistakes will significantly improve your design quality.
Final Thoughts
Following this step by step design guide for beginners gives you a clear path to start your design journey with confidence. Design is not something you master overnight—it requires patience, observation, and continuous practice.
Start simple, focus on fundamentals, and gradually improve your skills. As you gain experience, your designs will become more refined, professional, and visually appealing.
Keep practicing, stay consistent, and most importantly, enjoy the creative process.
FAQs: Step by Step Design Guide for Beginners
1. What is the best way to start learning design as a beginner?
The best way to start is by understanding basic design principles like balance, contrast, alignment, and hierarchy. Then, practice using simple design tools, follow tutorials, and recreate existing designs to learn how they are structured.
2. Do I need expensive software to learn design?
No, you don’t need expensive software to begin. Many beginner-friendly tools are available that offer free versions with templates, drag-and-drop features, and basic editing options. These are more than enough to get started.
3. How long does it take to learn basic design skills?
It depends on your consistency and practice. With regular effort, you can learn the basics in a few weeks. However, becoming proficient takes continuous practice and real-world experience over time.
4. What are the most important design principles for beginners?
The most important principles include:
Balance
Contrast
Alignment
Hierarchy
Repetition
Spacing (white space)
These principles help make your designs clean, organized, and visually appealing.
5. How many fonts should I use in a design?
It is recommended to use 1–2 fonts in a single design. Using too many fonts can make your design look messy and unprofessional. A good combination is one font for headings and another for body text.